The UIAA’s Summit Series explores a number of the world’s most iconic and challenging mountains and mountain ranges. Produced by the UIAA Medical Commission, they offer information on numerous areas including ascent profiles, acclimatisation and preparation. The papers also offer links to live information and introduces other useful areas of UIAA expertise.
About Aconcagua
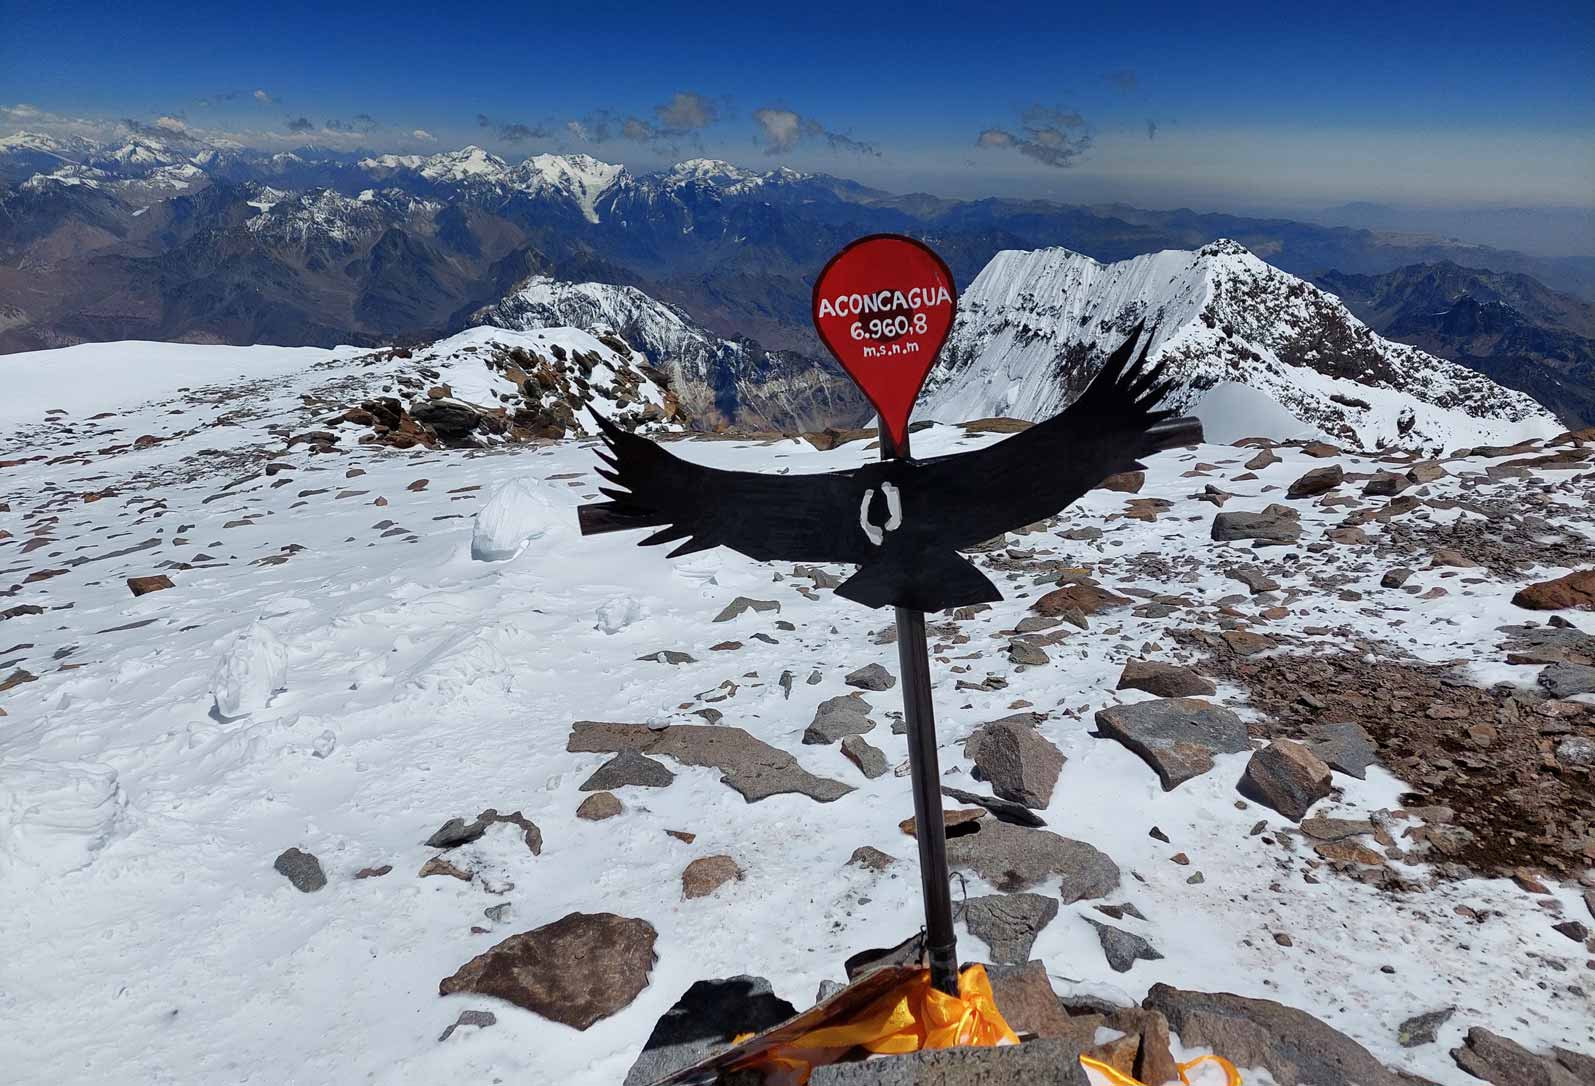
At 6960.8m and located entirely in Argentina, Aconcagua is the tallest mountain in the Americas and the highest outside Asia. Its South Wall is considered one of the most emblematic in the Southern Hemisphere. According to recent statistics, around 6,000 to 7,000 people per season attempt to reach the summit.
The hypoxia of high altitude, often paired with rapid ascent profiles, places climbers at risk for pathologies framed within what is known as high altitude illnesses. Altitude-related maladies such as AMS, HAPE and HACE are seen on a daily basis (please refer to the UIAA Medical Commission advice on these subjects).
The classic description of the mountain as a “trekking peak” is a mistaken notion. The changing weather conditions (especially strong winds and low temperatures) and the circumstances of hypoxia, added to the lack of experience of some mountaineers, create a cocktail that can raise the technical difficulty considerably.
This article describes options of ascents in order to have better possibilities of safety and success in Aconcagua.
Ascent of two routes:
Normal & 360°
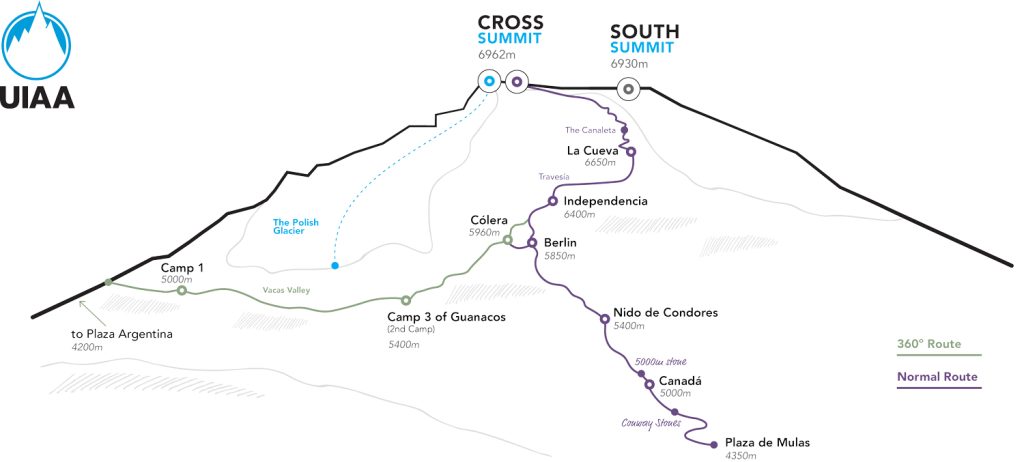
Routes
There are different routes to climb Aconcagua; from the fearsome south face, passing through the west face, the southwest ridge, the southeast ridge, the Polish glacier and even the normal route. There are also numerous variants. All this technical information can be found written in the published climbing guides that exist. Some of these are:
- ABC Aconcagua by Heber Orona (2010) Ed. Cavier Bleu. In English and Spanish.
- Aconcagua the summit of America by Mauricio Fernandez (2008). In English and Spanish.
- Aconcagua a climbing guide by R. J. Secor (1999), Ed. Mountaineers book. In English.
The following text details only the two most regular routes at present. These are:
1 – Normal Route, through the Horcones Valley entrance
2 – 360° route through the Vacas valley entrance
Both options of ascent have similar technical difficulties, varying in duration and the geographic route.
Route Description – Horcones Valley Entrance
The following itinerary is one of the examples to ascend through the Horcones Valley. This programme is one of the most famous since it aims to prevent altitude-related complications such as AMS, HAPE, or HACE by promoting a well-balanced adjustment to the environment.
These conditions can be fatal, which is why it is crucial to emphasise the importance of the following acclimatisation plan. Please also refer to the UIAA video content at the foot of this paper.
Schedule
Day 0 Arrival to Mendoza city (750m)
Day 1 Transfer by car to Penitentes (2500m) or Puente de Inca (2700m)
Day 2 Entrance to Horcones and hike to Confluencia Camp (3400m)
Day 3 Hike to Plaza Francia viewpoint (4000m) and return to Confluencia (3400m)
Day 4 Hike to Plaza de Mulas (Base Camp or BC) 4350m
Day 5 Rest Day at BC (4350m)
Day 6 Carrying gear to Camp 1 (5000 m) and return to BC (4350m)
Day 7 Rest Day at BC (4350m). Some groups ascend Cerro Bonete (5004m) this day
Day 8 Ascent to Camp 1 (5000m)
Day 9 Ascent to Camp 2 (5400m)
Day 10 Rest day at Camp 2 (5400m)
Day 11 Ascent to Camp 3 (5960m)
Day 12 Summit attempt
Day 13 Extra day
Day 14 Extra day
Day 15 Extra day
Day 16 Descent to BC (4350m)
Day 17 Descent to the entrance of Horcones (2800m) and return to the city of Mendoza
Detailed Schedule
Day 1
The transfer by bus or rented vehicle can be arranged in the city of Mendoza and takes approximately 3-4 hours. Some climbers spend the first night in one of the lodges in the small villages near the mountain. This facilitates the acclimatisation process and allows organising the loads to be carried by mules and other logistical details. The nearby villages that are usually used are Penitentes (2400m), Puente de Inca (2700m) or Las Cuevas (3100m). The three villages mentioned are located on the margins of the international highway N°7.
Days 2 and 3
The beginning of Ruta Normal is located at the Horcones Valley entrance (32° 48′ 40″ S 69° 56′ 32″ W) 190 km west of the city of Mendoza on highway No. 7.
After going through the entrance permit control at the ranger station in Horcones, the hike begins towards the first intermediate camp on the way to base camp. This camp is called Confluencia and is located at an altitude of 3,400 m.s.l. The hike is simple, well-marked and usually takes about three-four hours. The difference in altitude is 450m and it is a good way to start the ascent and then spend the night in Confluencia.
In Confluencia, you must register with the park rangers and there is a medical service station where it’s mandatory to attend to do the first check up inside the Park. The check-up includes a general medical questioning (prior experience, training history, medications, etc) carried out by a medical professional. After pulse oxymetry, respiratory exam, blood pressure are taken, a specific examination according to the patient is carried out if necessary. Many climbers spend two nights in Confluencia. This allows a gradual acclimatisation process. In addition, during the second day in Confluencia, you can hike up to “Plaza Francia viewpoint” at 4000 m.s.l. From this incredible panoramic point, you can contemplate and take pictures of the famous Aconcagua South Wall, a highly recommended experience.
The hike to the “Plaza Francia viewpoint” and return to Confluencia Camp usually takes a five-hour round trip.
Day 4
The next stage is to hike up to the main base camp (BC) Plaza de Mulas (4350 m.s.l). Known for its demanding length of 20km, this hike typically takes mountaineers between six and nine hours to complete. Beyond being a rigorous physical challenge, it serves as an excellent test of fitness and provides valuable insights into what lies ahead as climbers ascend higher up the mountain. The elevation gain approaches 1000 meters, and while the path primarily consists of trails, there are certain sections where the trails tend to disappear, particularly when crossing small streams.
The final part of the route is called “Cuesta Brava” often serving as the ultimate challenge before reaching Plaza de Mulas. It is a steep slope of almost 300 meters which may seem more intimidating than it actually is. The beginning of the Cuesta is indicated by the presence of an old shelter, now in ruins, once utilized as a camp over 70 years ago. Currently these ruins receive the name of “Colombia” due to some inscriptions that were written on its walls. Some people usually rest here for a few minutes before ascending the “Cuesta Brava”.
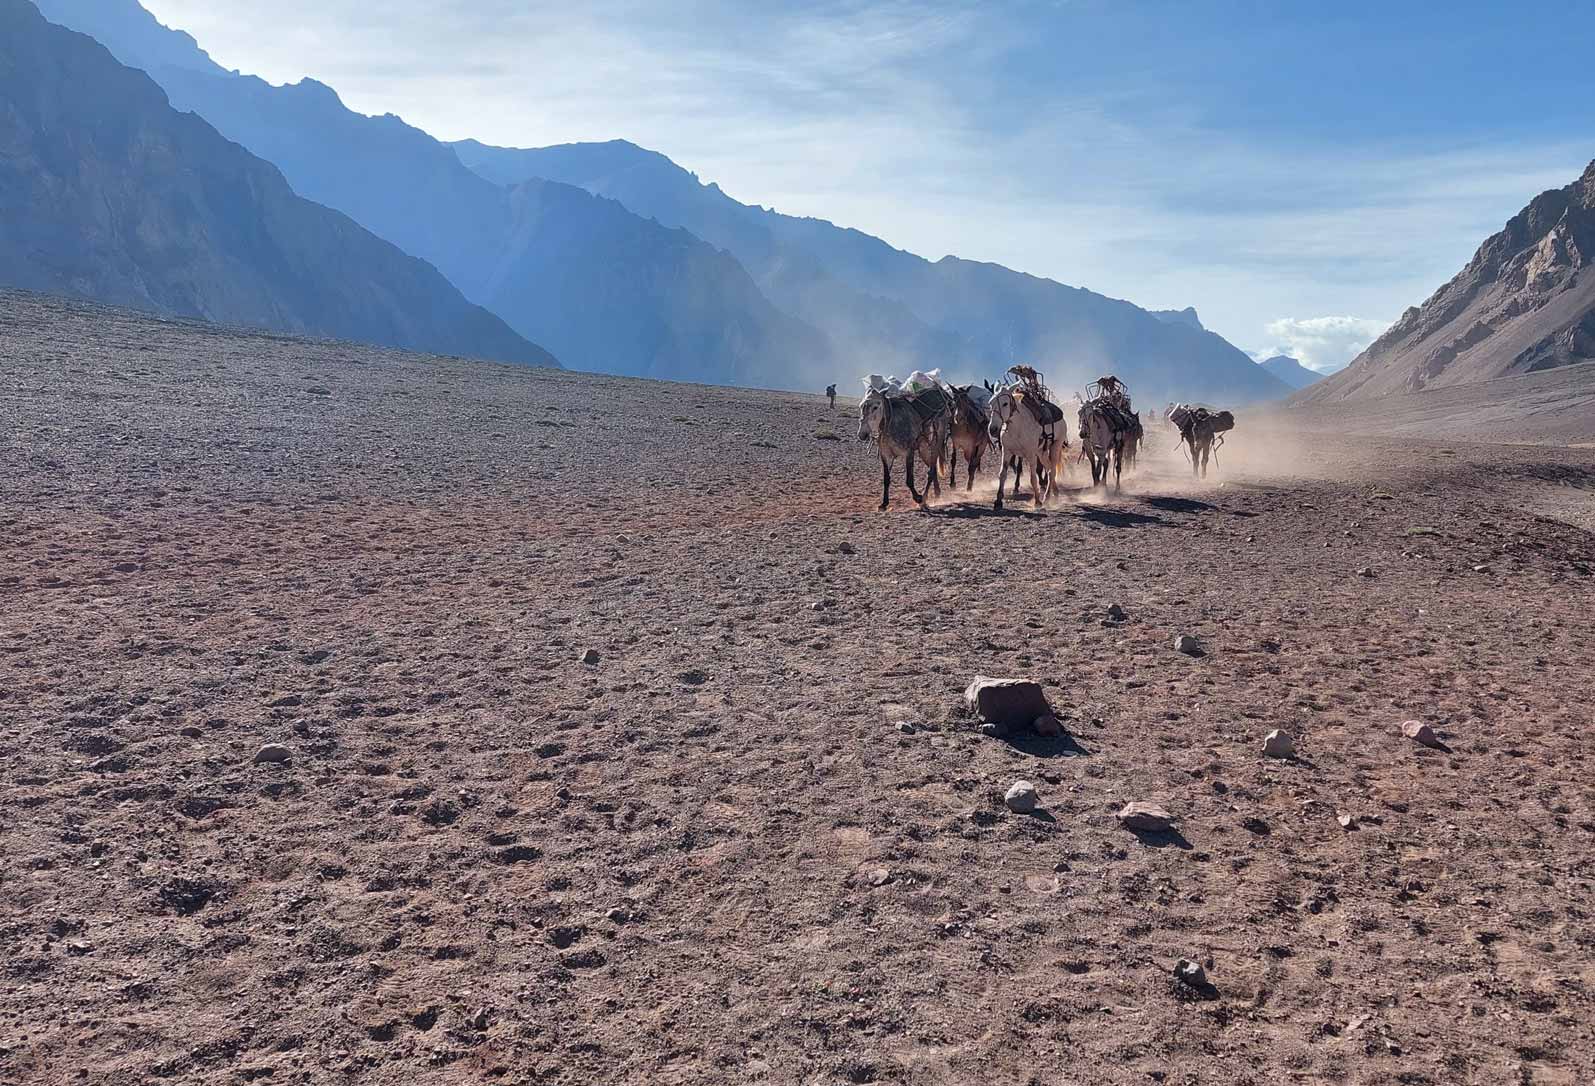
Throughout this part of the route, you must pay special attention to the presence of mules. They carry the load and in certain narrow parts of the trek, they can get dangerously close to the climbers pushing them to the sides. Traumatic accidents have been reported on more than one occasion due to this phenomenon.
During this day, climbers will endure a 950m elevation gain in just one day. This can be out of the applicable international guidelines on acclimatisation. However, there are no other camps in between to sleep in. That is why, after that, people rest at base camp for more than one night.
Day 5
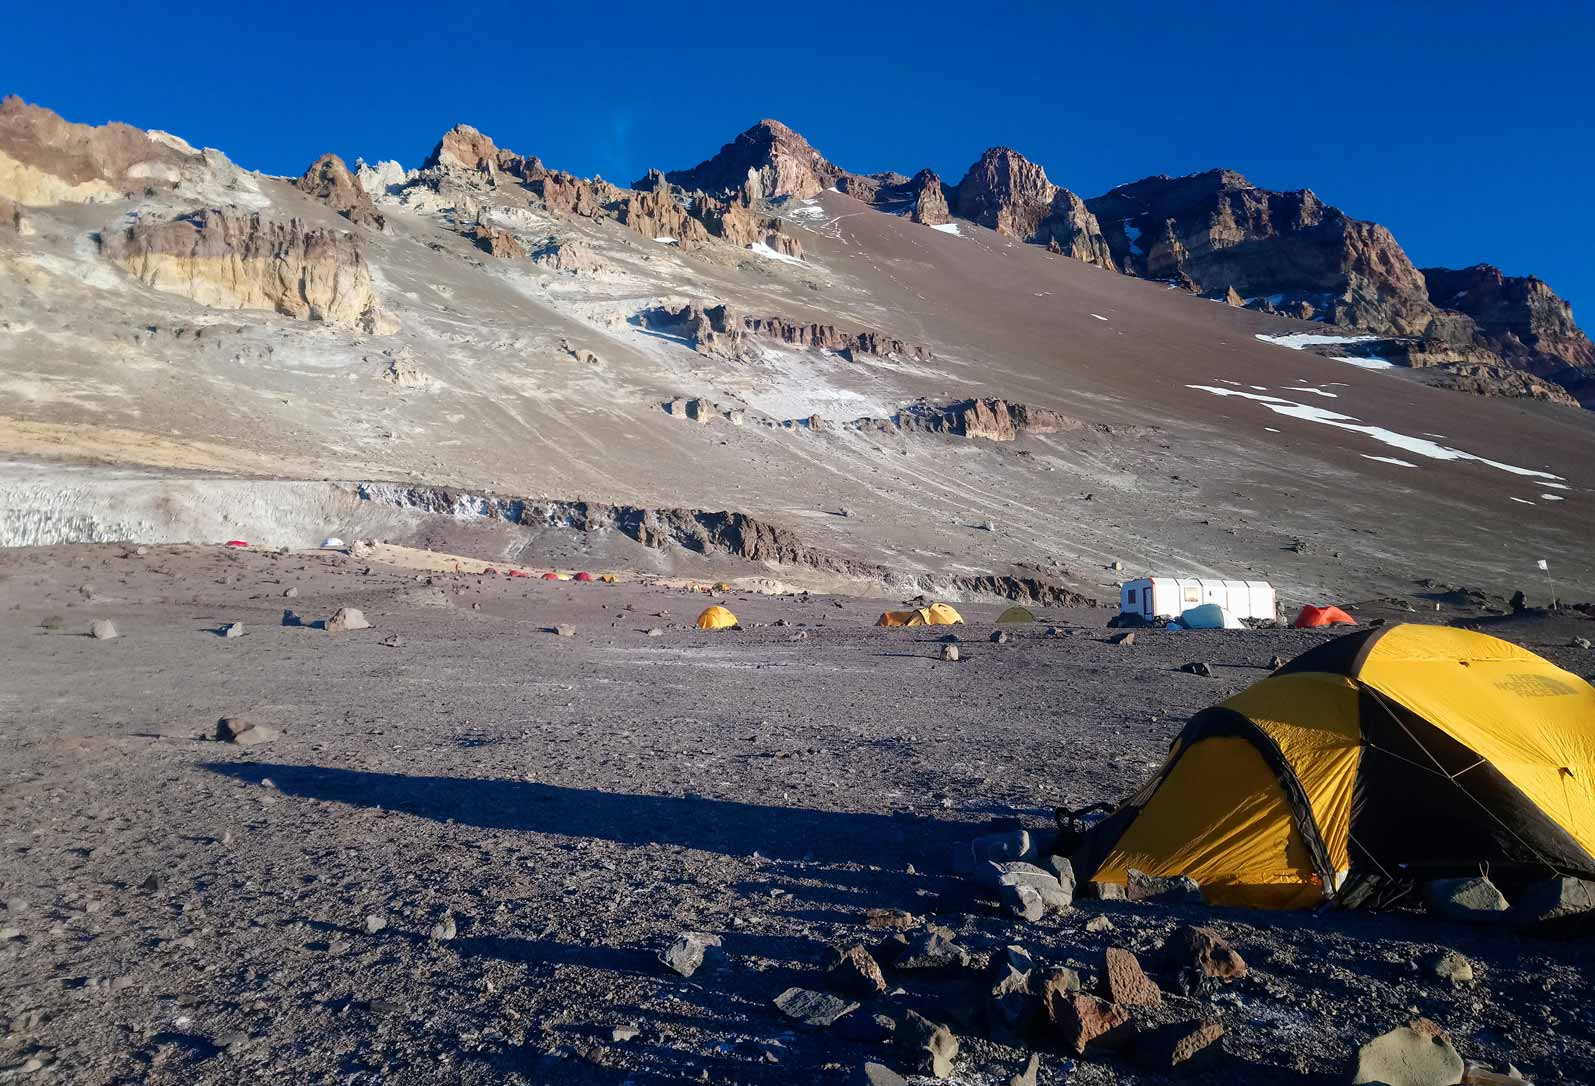
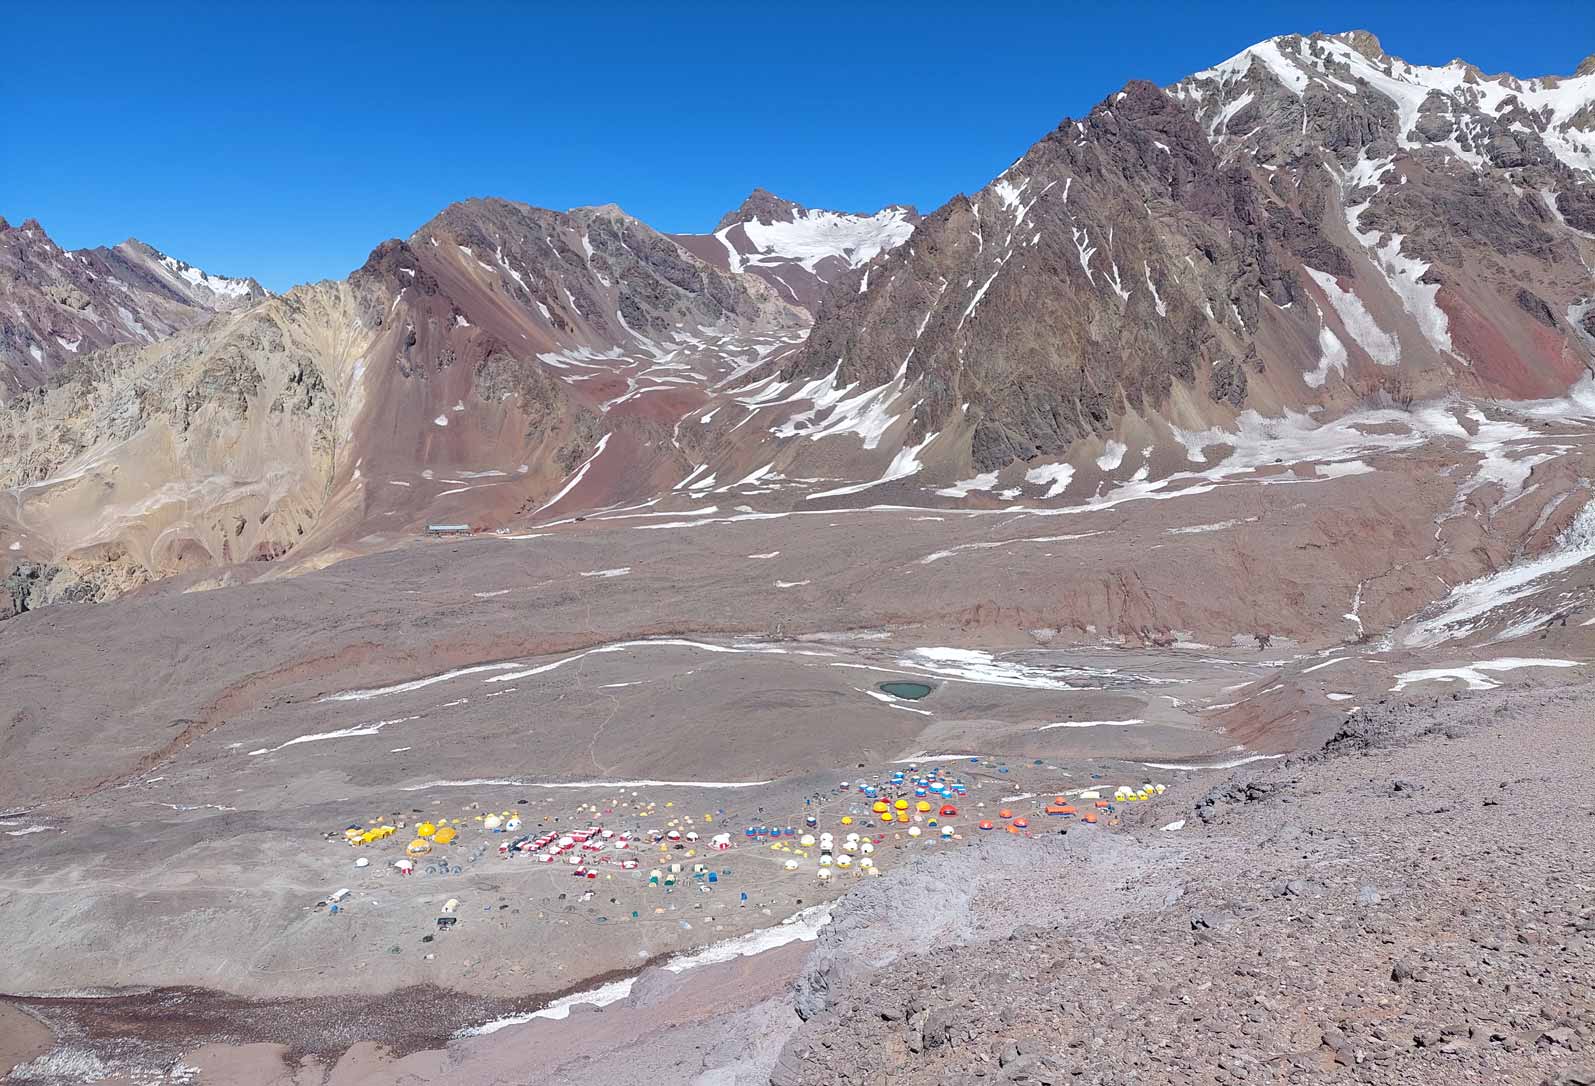
During the high season, Plaza de Mulas is often crowded, and it is described as a small mountain village. Several companies offer a variety of services such as meals, lodging, showers, internet access, porters, and guide services. Medical teams, park rangers and the Police Rescue Patrol are also based here. All climbers must undergo a medical check-up before ascending and check in at the ranger station on site.
The acclimatisation process continues in BC and to make the days bearable, day five is often used as a rest day, especially after the long hike and the almost 1,000 m vertical drop of the previous day. Many climbers use this day as an “active rest” and tour the camp, visit an on-site art gallery, check in at the ranger station (which is mandatory) and organise equipment and food to be able to continue with the plan for the following days.
For most people, the next few days mark the beginning of the process of moving gear and food to camps 1 and 2, which is a big task. As performance above 6,000 m.s.l. will depend on the previous acclimatisation process, and as the response to acclimatisation is usually self-paced, it is worth respecting ascent plans such as the one shown in this paper, to make the whole acclimatisation process more bearable.
Please bear in mind the work of the UIAA Medical Commission, which recommends that, once above 3,000 m.s.l., climbers should not sleep more than 500m above the previous night’s altitude and, more importantly, that they should rest for two to four days after this altitude.
Day 7 (alternative Bonete Peak)
Some mountaineers choose not to rest in BC and climb the 5004m Bonete Peak. Its ascent offers an accessible and beautiful alternative from which to take photos towards Mount Aconcagua and its normal route (which is usually seen in large part). The ascent to the summit can be done in four hours and, since you only need to carry water, some food and warm clothes, the effort is not so great. After another day of rest, the real work of ascending the normal route of Aconcagua can begin.
Information on Camps
In the area of the central Andes of Argentina, each camp usually has its own name. The Base Camp in the Normal Route is called Plaza de Mulas. And the following high camps 1, 2 and 3 also have their own names. In fact, they are more known in the park by their own names rather than by their numbers, which facilitates the understanding among all those who climb and work in the place, when referring to a particular geographical location.
High Camp 1 (5000 m.s.l.)
Canada Camp or simply Canada sits on a rocky promontory almost 700 m above BC. The climb is a good introduction to the mountain. The angle of ascent remains constant, and climbers usually cover it between 3 and 4 hours (just the ascent).
The first landmarks are the so-called ” traffic light” just 45-60 minutes from the BC, which marks the first stop for rest and good photos and marks the steepest slope of the day. The second reference point is the so-called “Conway’s rocks”, which appear just after the halfway point, used as a second rest stop to replenish fluids and sit for a few minutes.
Once in Canada, water is obtained from a nearby stream or snow. Water in Canada can be variable in reliability, so treatment is recommended. Please refer to the following UIAA video on water treatment.
It is important to mention that, due to climate change, that during the last three or four seasons and during the sunniest days both the snow and the stream disappear momentarily, forcing climbers to carry water from Base Camp. It is important to keep this in mind especially in January.
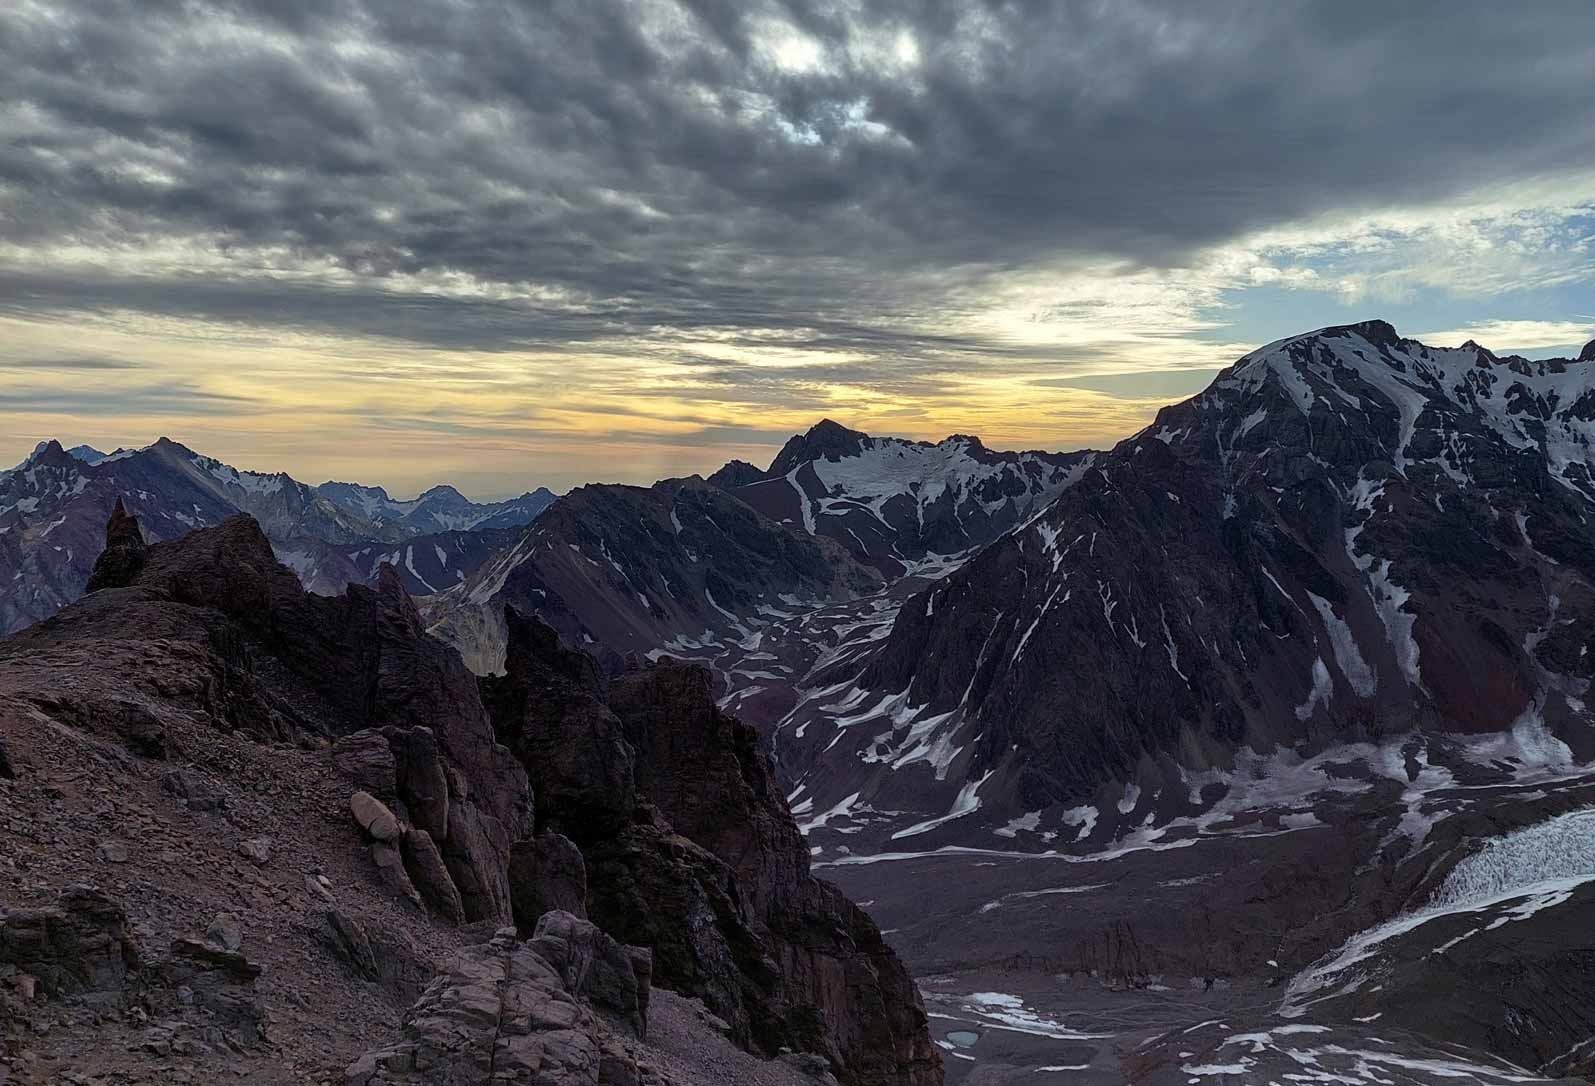
The views of the sunsets from Canada are recommended to contemplate and take pictures!
Camp 2 (5450m)
“Nido de Cóndores” is usually used for more than one night, either because of its height, its amplitude or because it offers the last chance to acclimatise before facing the upper part of the mountain.
Nido de Cóndores is located on a wide and flat terrain. There are large tents belonging to the agencies that offer services and the heliport as it works as the last evacuation point for the helicopter (see section below). In addition, there is a small building for park rangers and the police rescue patrol hut. During the busiest times of the year, there are several rescues per day at this camp.
To get to Nido de Cóndores, follow the well-marked road from Canada. The first reference point is the famous “Piedra de los 5 mil (literally, “Stone at 5 thousand”) which is at 5100 meters above sea level and owes its name to old and erroneous barometer measurements. Here people usually rest for a few minutes before continuing to the next point which is at 5,300m and is called “Cambio de Pendiente”. “Cambio de Pendiente” used to be used as a campsite, but due to the degree of exposure to the wind and the scarcity of water, practically nobody uses it.
Finally, the arrival at Nido de Cóndores is marked by the presence of tents and the police rescue patrol hut, which can be seen from a distance. At Nido de Cóndores water is obtained by melting the snow itself or from a small lagoon nearby (10 minutes) from where it is obtained in liquid form. It is recommended to treat the water for consumption.
Some climbers choose to wear light trekking shoes up to Nido de Cóndores if conditions permit. The choice is entirely personal. However, if the mountaineer has not used his or her high mountain boots, it is advisable to wear them for the first time on these stretches to avoid surprises further up.
The nearby rock formations, mountains and surrounding glaciers offer great views from Nido de Cóndores and invite to be photographed. Many climbers choose to spend two or more nights resting at Camp 2 before deciding to continue climbing.
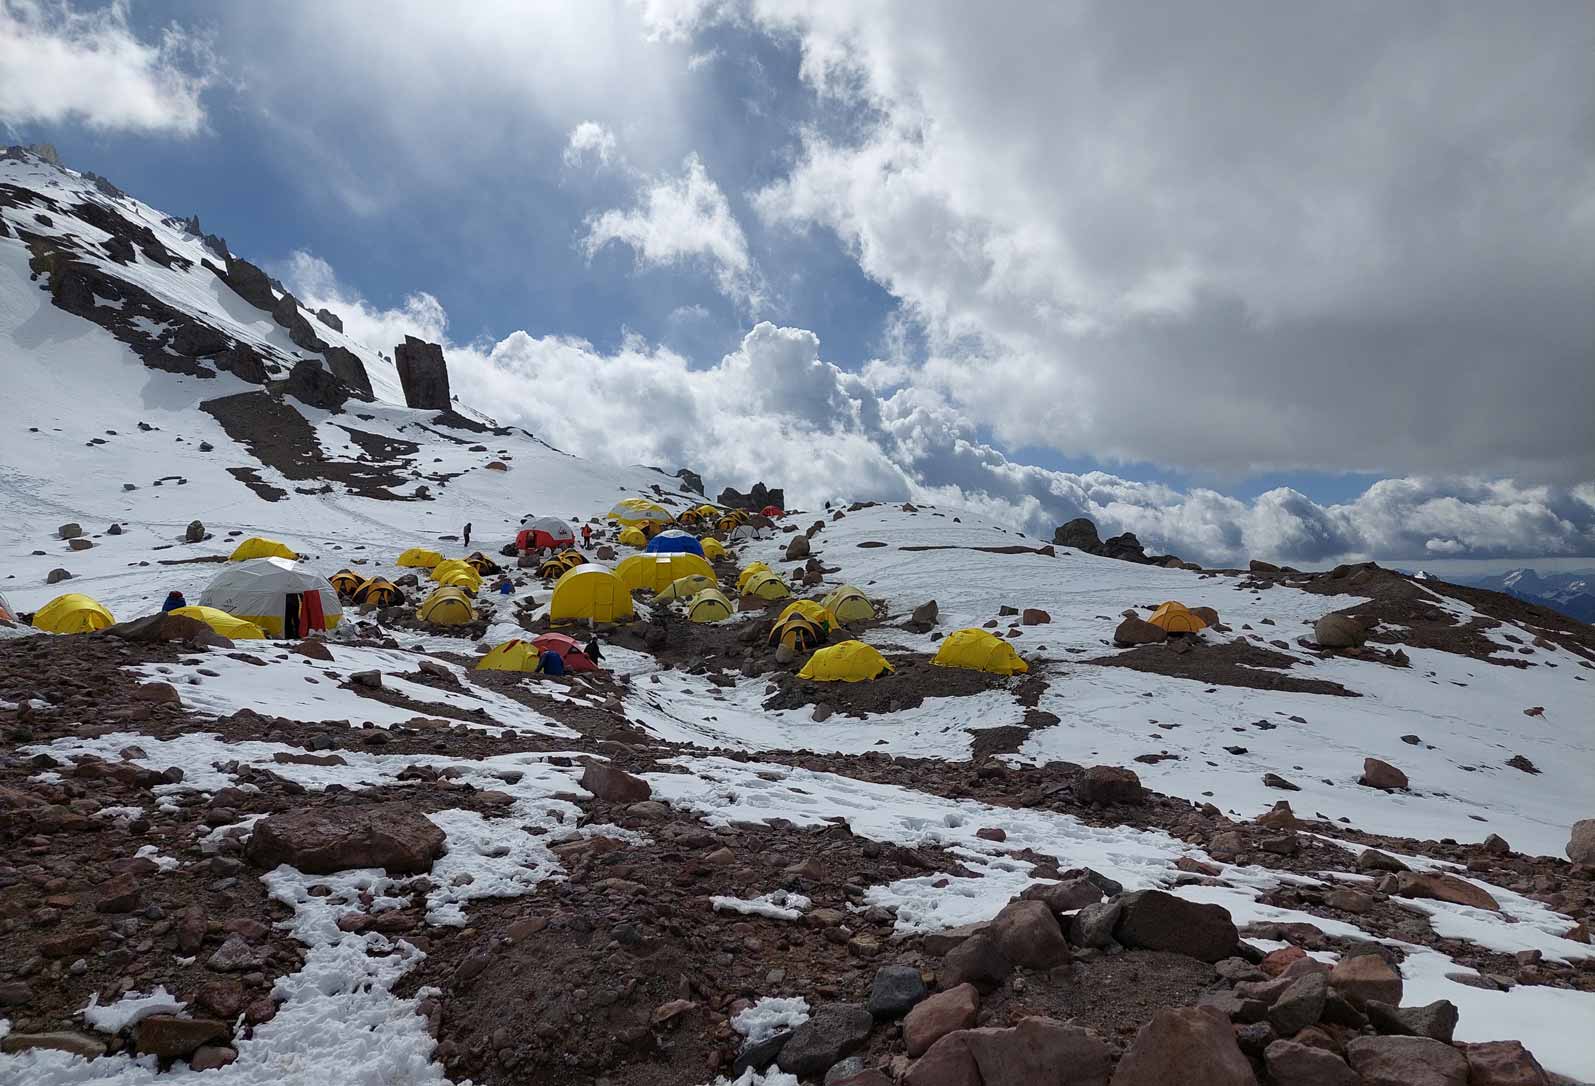
Camp 3 (5960m)
There are two options that are used as Camp 3 and both have almost the same height above sea level. The more regular and higher place is called “Cólera” and the less used one is called “Berlín”. The two camps are only 10-15 minutes from each other. In fact, the older one is Berlin, but it fell into disuse due to human impact (garbage and waste deposit). In its place came Cholera, which over the last 25 years has become the most used option today. This does not mean that it is free of human impact.
“Berlin” (5,900 m.s.l.) is a group of three triangular wooden huts deteriorated by time. These huts were used in the 1960s, 70s and 80s for shelter, but are currently unusable. Water is obtained from melting snow. But the presence of old garbage and human waste means that contamination can become a concern and requires treating the water before consumption. For this reason, mountaineers prefer to use the “Cólera” camp.
If in Berlin there is space for no more than 40 or 50 tents, in Cólera the space is enlarged, being able to double this value.
To get to Berlin from Nido de Cóndores there is a well-marked trail that is easy to follow unless it is blocked by a recent snowstorm. And to get to Cólera from Berlín, the trail continues for only 50m to the north. From there it is necessary to overcome a small rocky projection of 20 meters. To climb these meters there are a series of fixed cables that facilitate the task. Snow can be found more easily in Cólera to obtain water than in Berlin.
Sometimes it may be necessary to use crampons to reach camp 3 (Berlin or Cólera).
If acclimatisation is good, the trip to Berlin or Colera camp should not take more than three or four hours.
Summit Day
The summit day on Mount Aconcagua is a difficult day from a physical point of view. And it does not compare to any predecessor day in the schedule. In fact, many people tend to believe that attempting the summit can be easily reached from Camp Cólera at nearly 6000m. However, the summit days is extremely demanding, and many undesirable outcomes can easily occur if good advice is not followed.
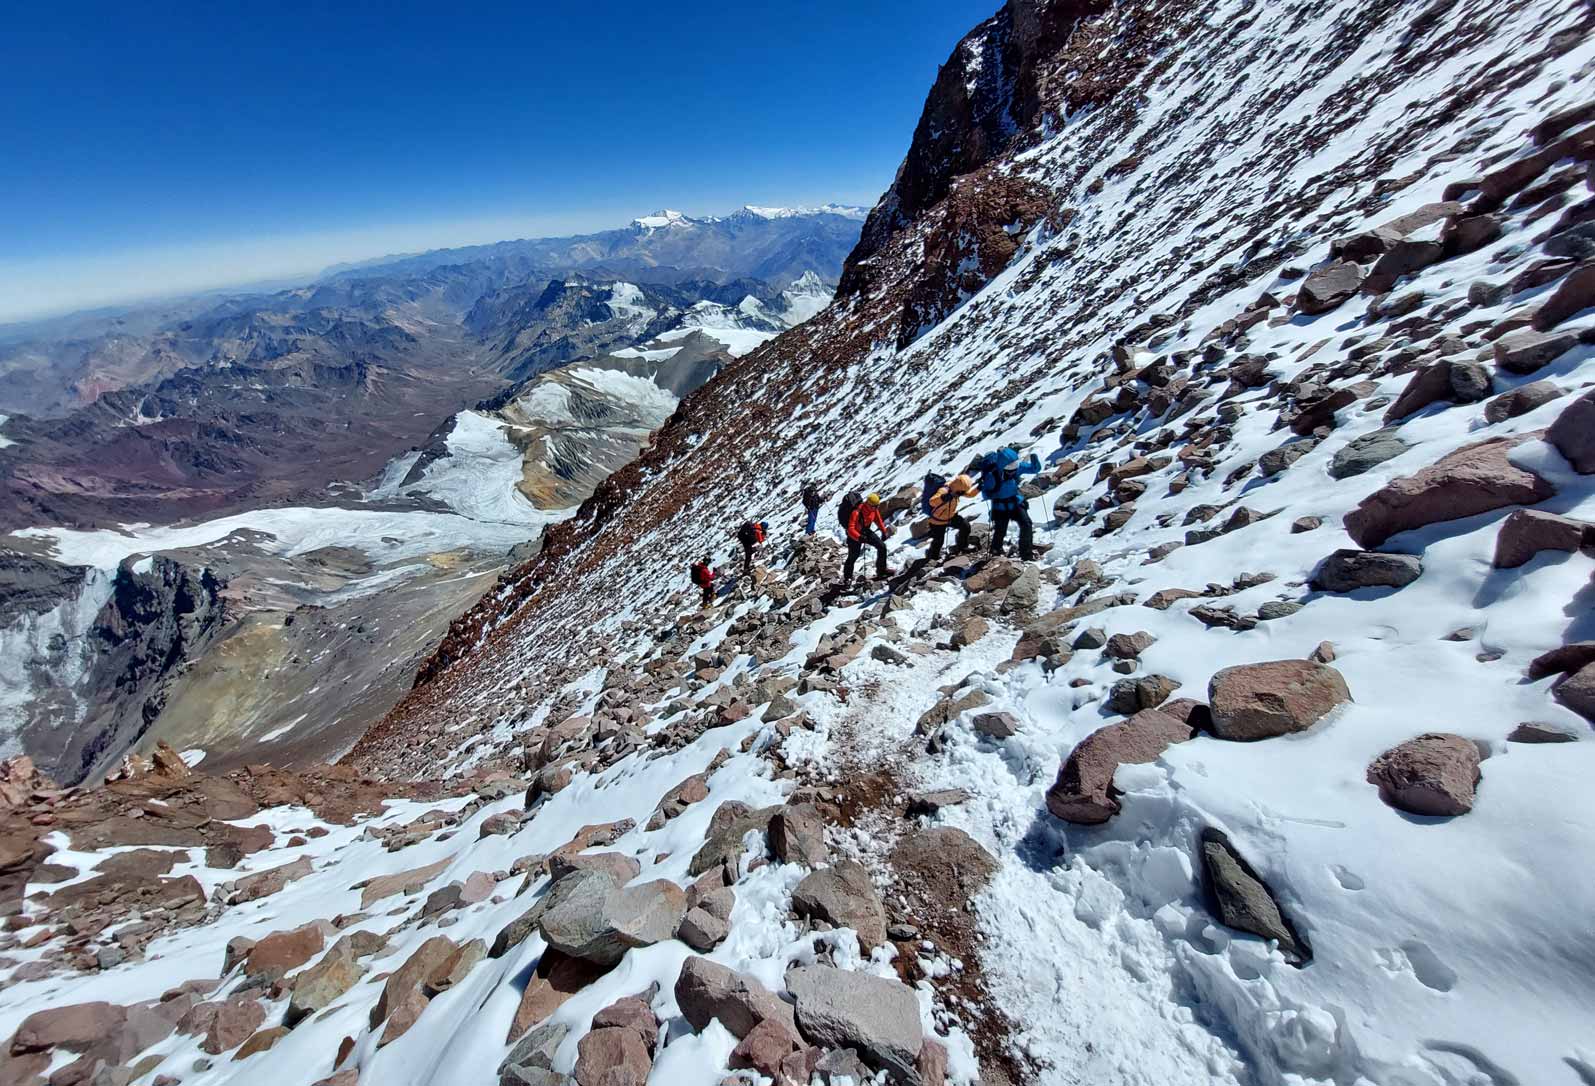
To analyse summit day, the section can be divided into three distinct sections. First, the steep road to “Independencia”. Second, the so-called “Travesía”. And third, the so-called “Canaleta” and the final approach to the summit.
First section up to “Independencia”: Located at almost 6400 meters above sea level, Independencia is a place where you can see an old wooden shelter in ruins. This geographical point marks the end of the first stretch and in this place the climbers take a break to replenish energy, drink some hot tea and get ready for what follows. People usually take around three hours to get here. From this place, progress becomes slow due to the altitude and difficult due to the exposure to the wind and cold. The wind chill here is marked and Independencia is usually the first place from which those who do not feel well or are exposed to freezing decide to turn back.
The second section is called “La Travesía” (“The Traverse”): This section that goes from Independencia at 6400m to the place called “La Cueva” (“The Cave”) at 6700m is usually very exposed to wind and cold. Those who manage to do the section in time and form usually take between two to three hours, even though it has the appearance of being shorter and easier than it looks at first glance.
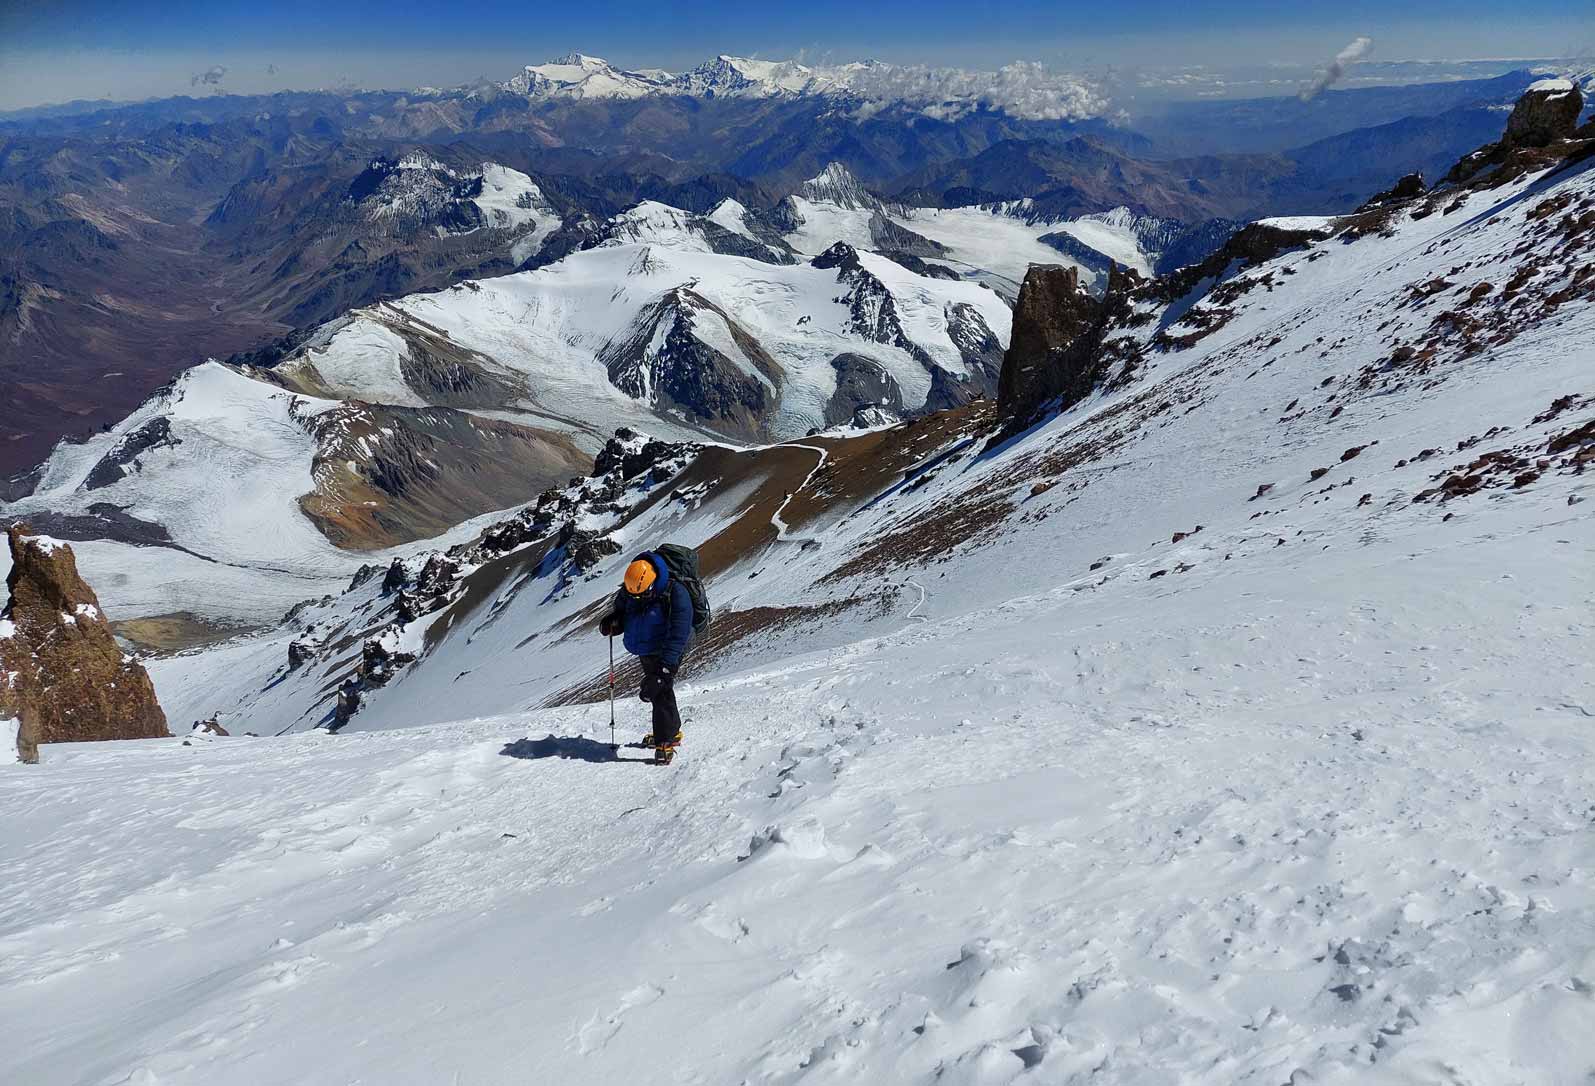
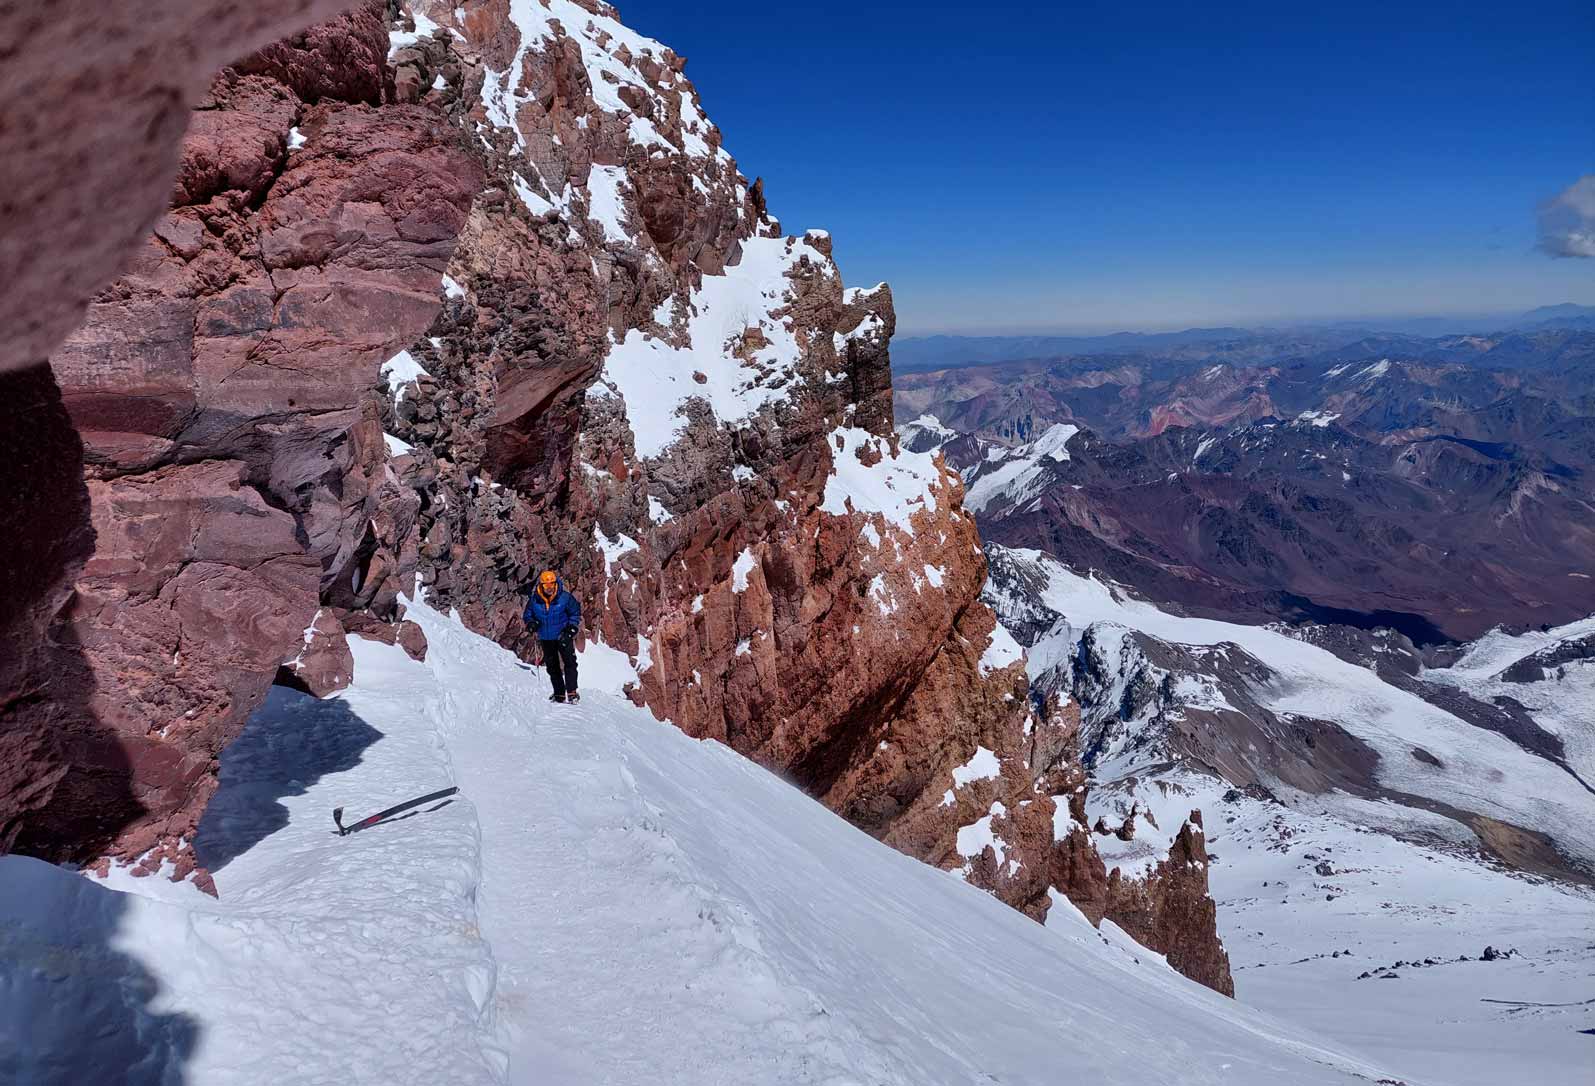
The third and last section is the most difficult from the mental and physical point of view. It is the so-called “Canaleta” that begins in the place called “La Cueva” at 6700m and culminates at the summit itself at 6960 meters. In “La Cueva” climbers usually rest again for the final stretch and many do it in this place since it is usually protected from the wind, and it is sunny from about 10 in the morning (depending on the time of the season). From this point on, progress becomes much more difficult and slower. Climbers usually take between two to six pitches and stop to breathe. The final section of the “Canaleta” is a left traverse that runs just below the so-called “Filo del Guanaco” (Guanaco´s ridge”). The views from this section to the summit are tremendous and you can admire, among other things, the top of the south wall. Thus, you slowly gain altitude up to the final 15-meter ledge that leads to the summit itself at 6960m, marked by a kind of cross in the shape of a condor.
The “Canaleta” is usually covered in two to three hours. In some seasons or depending on previous storm history it may not be necessary to carry crampons or ice axe up here, but most of the time you have to put them on from Independencia. Sometimes even from Cólera Camp at 6000m.
After the photographs of the summit, it is advisable to descend without delay and to have a safety margin. Most of the incidents on Aconcagua occur during the descent and that is why it is necessary to be very attentive during the descent. After a summit attempt, most climbers choose to spend the night in Cólera or Berlín (Camp 3), due to fatigue after a full day of about 13-14 hours.
It is worth mentioning here, and only as a statistical exception, that a few strong climbers descend all the way down to Base Camp. This is an alternative that can be considered, since the daylight hours can extend until 21:00 or 22:00, thus avoiding another night at 6000m. This approach is only considered for climbers with excellent physical condition and good acclimatisation.
From Cólera or Berlin Camp, the descent to Plaza de Mulas can normally be completed in three to six hours.
Day 17
The trip to Horcones (2,800 m.s.l.) is long and is usually done in one go, stopping for an hour to drink something in Confluencia. After several days on the mountain, climbers feel tired and some choose to rest one more day in Base Camp or pay the helicopter service to make the trip. If you choose to descend on foot, be sure to eat and drink plenty of water. Temperatures rise again as one descends and the body severely feels this hike, which takes place in a dry region. This aspect should not be neglected.
Route Description – Route 360° (from Vacas Valley)
The 360° route that ascends the mountain from Vacas Valley is known by that name because after the summit attempt, climbers descend through Plaza de Mulas and Horcones Valley, which correspond to the normal route. In this way a 360-degree circuit is completed entering through one valley and returning through another. In fact, from Cólera at almost 6000 meters, the ascent is by the normal route. In other words, from this camp the 360 route follows the normal route.
There used to be variants such as the “false Polish” or some other, but due to the ease of the 360° route, these options have almost ceased to be used.
Plaza Argentina base camp is located to the east of the mountain and therefore receives the sun earlier than Plaza de Mulas, at around 07:00. Plaza Argentina offers the same services as Plaza de Mulas and tends to be somewhat less crowded.
Schedule
Day 0 Arrival to Mendoza city (750m)
Day 1 Transfer by car to Penitentes (2500m) or Puente de Inca (2700m)
Day 2 Entrance to Vacas valley (2,450 m) and hike to “Pampa de Leñas” camp (2800m)
Day 3 Hike to “Casa de Piedra” camp (3400m)
Day 4 Hike to Plaza Argentina (Base Camp or BC) 4200m
Day 5 Rest Day at BC (4200m)
Day 6 Ferry loads to Camp 1 (5000m) and return to BC (4200m)
Day 7 Rest Day at BC (4200m). Some groups ascend Colorado peak only two hours from BC
Day 8 Ascent to Camp 1 (5000m)
Day 9 Ascent to Camp 2 (called Camp 3 of Guanacos) 5470m
Day 10 Rest Day at Camp 3 of Guanaco
Day 11 Ascent to Camp 3 Cólera (5960m)
Day 12 Summit attempt
Day 13 extra day
Day 14 extra day
Day 15 extra day
Day 16 Descent to BC (4350m) Plaza de Mulas
Day 17 Descent to the entrance of Horcones (2800m) and return to the city of Mendoza
Detailed Schedule
Day 2
The entrance permit check is done at Punta de Vacas Ranger Station, right at the beginning of the Vacas Valley. After the check, the hike is relatively easy to follow along a well-marked trail. After five to six hours of hiking you reach “Pampa de Leñas” camp (2850m). It is usually hot during this hike, so it is recommended to carry two or three litres of liquid and to protect yourself from the sun with a hat, sunscreen, and sunglasses.
In “Pampa de Leñas” you can get water from a nearby stream and camping is allowed in designated areas. Also, for those who wish, there are food services from some agencies that operate there.
Unlike the normal route that runs from the Horcones entrance portal, where mules go up and down to the base camp in one day, on this route the mules and their muleteers accompany the climber during the three-day trek to Plaza Argentina. Since the distance is greater, a lot of logistics must be coordinated with the muleteers having to leave each day the load ready to be transported by the mules on a previously established schedule.
Throughout this part of the journey, one must be attentive to the presence of mules. Although the mules go at their own pace and usually overtake tourists, they can get dangerously close to the climbers, pushing them to the sides. Traumatic accidents have been reported on more than one occasion due to this.
Day 3
This day the hike is six to hours hours in duration, and people arrive at the camp known as “Casa de Piedra” at 3200m. The hike begins with the crossing of the Vacas River, for which there is a steel bridge used for this purpose. A few minutes before reaching the camp and if you look to the west, you can see the east face of Aconcagua with the Polish glacier and part of the south wall on the left.
In “Casa de Piedra” there are also some agencies that offer services such as food. There is a stream to get water but be careful to do it far from where the mules rest and do their needs. It is advisable to treat the water for consumption.
Day 4
The last day before arriving at base camp lasts about six-eight hours and is the one with the greatest difference in altitude (almost 1000m). The hike begins early with the crossing of the Vacas River and its freezing temperatures. Here there are those who do it with wading shoes or those who pay a tip to the muleteers so that they cross with the mountaineers mounted on mules.
The valley that leads to the base camp is called the “Relinchos” valley, which is the sound that the guanacos make to alert the herd. You may be lucky enough to see such a beautiful animal. This valley is narrow and with ravines where you have to be careful not to fall. After a steep start, the road is less steep and gradually you reach Plaza Argentina base camp at 4200m.
Day 5
Day 5 is usually used as an active rest, touring the camp and organising loads to carry the following days to the upper camps. Several companies offer a variety of services such as meals, lodging, showers, internet access, porters and guiding services.
Medical teams and park rangers are also based here. All climbers must undergo a medical check-up before ascending and must check in at the ranger station on site.
Information about the camps at the top of the mountain (360° route)
As in the case of the Horcones Valley, the way the ascent is made will depend on the acclimatisation strategy. Here is one of the most used options with three extra days as alternatives to bad weather or to change the ascent plan. Some change the rest day at the upper camps and do it at Camp 1 and/or Camp 3 at Guanaco. The options will depend on the individual.
As in the normal route, the names of the high camps are also identified by their own names. And so, the first one is called Camp 1. The second is called Camp 3 de Guanacos (because it was the name of an old route that passed through there). And the third is again called Cólera, thus closing a circle that leads to the normal route.
Camp 1 (5000m)
The terrain up to this camp is very beautiful and runs through a valley through moraines and surrounded by beautiful walls, the south face of Cerro Ameghino (5960m) or the foothills of Aconcagua itself. In Camp 1 there is usually water and if not, it is obtained by melting snow. This hike has a difference in altitude of about 800 meters and a duration of about four or five hours.
Of the three camps, this section may be the most tiring.
Camp 2 or Camp 3 of Guanaco (5450m)
After a well-marked initial ascent, the route becomes flatter and in total it does not take more than three or four hours to reach Camp 3 of Guanaco. Here there is also usually running water or snow. After this camp the trail continues to the already described Camp 3 (“Cólera”) at almost 6000m of altitude.
From here, that is, from Cólera, the description is the same as the normal route from Horcones.
Special Considerations
Aconcagua Provincial Park issues four types of permits to enter the Park, depending on the activity to be carried out.
The options are: one-day trekking, three-days trekking, one-week trekking or the high mountain ascent permit (which has a maximum duration of 20 days). Only with the latter can mountaineers have the option of attempting the summit. Each permit has a different cost, depending on the four options mentioned above or on the time of the summer season in which the permit is purchased, or on the nationality (Argentinian mountaineers pay a lower cost than other nationalities).
Regarding the ascent permits, there are two prices, depending on whether the services of a local provider are hired:
- For those mountaineers who do not wish to acquire the service of a local provider, they have to buy an independent climbing permit, which is substantially more expensive.
Those who choose this option should also be aware that they are obliged to hire restroom services at base camp or intermediate camps to reach base camp (Confluencia, Pampa de Leñas or Casa de Piedra depending on the access valley). Permits are processed through a web page and are only issued in Mendoza. There they must be paid ONLY in cash, in Argentine pesos.
- Mountaineers who hire the services of an authorised company (from guided expeditions to individual services, such as a pack mule) are entitled to a discounted “assisted” entrance fee. The hired company provides the restrooms at the base or intermediate camps, so it is not necessary to contract this service separately. The “assisted” permits are managed by the companies, so they can be purchased and paid for remotely. Finally, permits are issued in the city of Mendoza.
Each permit is issued in dollars but paid in Argentine pesos. The price varies each season, but to get an idea, during the month of January 2024, the ascent permits to attempt the normal route was U$800 (with services from a local company) and U$1,300 (without services from a local company).
The UIAA recommends using the park’s website for annually updated information and logistical assistance.
Please refer to additional information on permits in the section below.
Essentials
Language
Spanish is the primary language, as in many South American countries. But English is also spoken in the Provincial Park due to the presence of people from all over the world.
Local Currency
The economic situation in Argentina has been characterised by inflation for more than 20 years plus devaluation of the Argentine pesos compared to the US dollar. Therefore, the exchange rate between Argentine pesos and dollars is not stated here as it could not be taken as an accurate estimation for future reference. Get good advice before making any payment or transaction. Websites such as https://www.xe.com give an approximate idea of the official exchange rate. Consult it before exchanging money.
It is also good advice to carry cash (pesos). Remember that in Argentina in small towns, cash is used for shopping. Within the Aconcagua Provincial Park and due to the presence of people from all over the world, dollars or pesos are accepted as a form of payment for the services consumed there.
Visa Requirements
For visa requirements please refer to your country’s Argentine embassy.
Medical
During your ascent you will have to undergo two medical check-ups. These will take place at Confluencia and Plaza de Mulas, if you ascend by the normal route, or at Plaza Argentina if you ascend by the 360° route. The medical checks must be successfully completed before you are allowed to continue. In such controls, data such as arterial oxygen saturation, heart rate, blood pressure and pulmonary auscultation are taken. In addition, questions are also asked about long-term medical problems, as well as any altitude-related symptoms you may be experiencing at the time. The main emphasis is on the preventive aspects of altitude and cold. These services are also available for emergencies if necessary.
It is always advisable to carry a personal first aid kit and personal medication if any medicine is consumed. In this case it is the mountaineer’s responsibility to carry enough medicine doses for an ascent that can last up to 20 days.
Vaccinations & Infectious Diseases
Like all countries in South America, Argentina has a prevalence of hepatitis A. The Ministry of Health of the Republic of Argentina currently recommends vaccination against Hepatitis A Virus for adults (with a 2-dose schedule) in people who may be exposed as travelers.
Regarding the Dengue virus, transmitted by a species of mosquito of diurnal behavior (the Aedes aegypti), there are cases in Argentina. And, although very few, there have also been cases in the province of Mendoza (14 confirmed cases as of February 2024). In case of symptoms such as fever accompanied by: intense headache, pain behind the eyes, muscle and joint pain, nausea and vomiting, itching and/or bleeding of the nose and gums, intense tiredness or skin rash; a health center should be consulted.
In the city of Mendoza, the hospital specialised in infectious diseases is the Lencinas Hospital. Its address is: Talcahuano St (without number), Godoy Cruz, Mendoza.
There is no vaccine against dengue fever. Prevention to avoid mosquito bites, which are active during the morning and afternoon, is to use repellent and clothing that covers arms and legs. There are no mosquitoes in Aconcagua Provincial Park since it is a high mountain area.
Aconcagua is located in central western Argentina and no yellow fever vaccination or preventive malaria prophylaxis is required there. However, if you wish to travel before or after Aconcagua to jungle areas bordering Paraguay or Brazil, a yellow fever vaccination certificate is required.
Hospitals
In the event of an evacuation of the Aconcagua Provincial Park, the nearest health centre used is in the small town of Uspallata, 80km away from the Park entrance. There is a hospital there with basic care and hospitalisation services.
For more complex problems, evacuations are made to the city of Mendoza, 180km away. It should be remembered that the metropolitan area of the city of Mendoza has a population of 1 million inhabitants, so there are hospitals of all types of complexity and care in the city.
Climbing Seasons
The official climbing season for Aconcagua begins on 15 November and ends from 15-28 February. This date changes from year to year depending on the park authorities´ political decisions. This information should always be checked before each season on the web page: https://www.mendoza.gov.ar/aconcagua
For three-day treks, the park authorities keep the Confluencia campground open until April.
Outside these dates, it is considered the winter period. During the winter period, ascents to the summit are only allowed with the approval of a special permit that must be requested months in advance from the government of the province of Mendoza. During this period there are no services inside Aconcagua Provincial Park.
Pre-acclimatisation
It should be mentioned here that since about 2010 various pre-acclimatisation protocols have begun to be used.
On the one hand, protocols define using chambers or masks that simulate different altitudes by inhaling inspired fractions of oxygen lower than those at sea level. One must have the discipline to strictly follow these protocols. After that, climbers try to ascend the mountain by shortening the acclimatisation plan in some parts. Some commercial agencies even offer this previous acclimatisation as an alternative to shorten the stay on the mountain.
On the other hand, there are pre-acclimatisation plans in mountains near Aconcagua Provincial Park. These plans usually last a week and reach heights of up to 5900 m (16000 ft). If these methods are successfully followed, they make the stay in Aconcagua shorter and much more bearable. There are several options for pre-acclimatisation programs in nearby mountains, but they are beyond the scope of this text.
Finally, it is worth mentioning that the ascent with supplemental oxygen support is being used. Although it is not yet a very popular method, there is a trend emerging since some companies are starting to offer the services.
Permit Duration & Acclimatisation
The ascent permit issued by the Provincial Park authority is for a maximum of 20 days. Most people will attempt the mountain in less time. Using less time to climb the mountain can create concerning situations in which poorly acclimatised climbers attempt the summit in less-than-ideal conditions simply because they want to climb in a hurry. This article describes a schedule following the Wilderness Medical Society (WMS) recommendations and allows enough time for four possible summit days. The key to climbing Aconcagua is good acclimatisation. Do not rush and respect personal acclimatisation times.
The extra summit days can be used to modify the schedule in case of bad weather or to modify the ascent plan favouring even more acclimatisation as shown in the following examples.
Day 0 to Day 5 same as the example shown above
Day 6 Ferry loads to Camp 1 (5000m) and return to BC (4350m)
Day 7 Rest Day at Base Camp (4350m)
Day 8 Ascend to Camp 1 (5000m) and sleep in Camp 1
Day 9 Ascend to Camp 2 (5400m) and sleep in Camp 2
Day 10 Descend to Base Camp (4350m)
Day 11 Rest Day at BC (4350m)
Day 12 Ascend to Camp 2 (5450m)
Day 13 Rest Day at Camp 2 (5450m)
Day 14 Ascend to Camp 3 (6000m)
Day 15 Summit Day
Day 16 Extra Day
Day 17 Extra Day
Day 18 Descend to BC (4350m)
Day 19 Descend to Horcones entry (2800 m) and back to Mendoza city (750m)
Another example with a subtle difference:
Day 0-5 same as the example shown above.
Day 6 Ferry loads to Camp 1 (5000m) and return to BC (4350m)
Day 7 Ascend to Camp 1 (5000m) and sleep in Camp 1
Day 8 Ascend to Camp 2 (5400m) and sleep in Camp 2
Day 9 Descend to Base Camp (4350m)
Day 10 Rest Day at BC (4350m)
Day 11 Ascend to Camp 2 (5450m)
Day 12 Rest Day at Camp 2 (5450m)
Day 13 Ascend to Camp 3 (6000m)
Day 14 Summit Day
Day 15 Extra Day
Day 16 Extra Day
Day 17 Descend to BC (4350m)
Day 18 Descend to Horcones entry (2800m) and back to Mendoza city (750m)
Transport of equipment to/from Base Camp
Mules cover most of the transportation needs between Horcones and Plaza de Mulas, or between Punta de Vacas and Plaza Argentina (route 360°). Mules can make the trip to Plaza de Mulas in a few hours. Each mule can carry up to a maximum of 60 kilos depending on the conditions of the agencies offering their service. Costs vary from season to season and from agency to agency and are updated every year.
From BC and to any camp at the top of the mountain (camp 1, 2 or 3) it is possible to hire porters who can carry loads of up to 20kg. Rates and conditions also vary and can be consulted at the BC itself. The porters do not accompany the client who hires their service. They only carry the load at their own pace and leave it at the agreed camp.
Communication
There is no cell phone service in the area.
It is important to emphasise that above Camp 2 (or in bad weather from base camp), evacuations depend exclusively on the actions of the guides, mountaineers or porters present at the site and the collaborative work of the park ranger service, medical service, and police rescue patrol.
The police rescue patrol is highly trained to attempt rescues on the normal route and will call on the help of guides and porters if they are outnumbered. The police rescue patrol is based at Plaza de Mulas base camp and their highest base of operations is at Nido de Cóndores (5,450 m). From there they receive information and requests for help by VHF radio (frequency 142.800).
Although it is good and advisable to have devices such as SPOT or InReach for distress calls, on the normal route, the fastest way is to use the Handy portable radio. Since there is a VHF signal from practically any geographical point on the normal route and the reception of the distress request is immediate.
Those who receive the request for help are the police rescue patrol and they, together with the medical service and park rangers (who operate on the same radio frequency), decide on the action and coordination of a request for help.
Despite all these services, rescues of victims from altitude, especially from the “Travesía” or the “Canaleta” or the summit itself, are plagued with technical difficulties. The altitude, the uneven terrain, the snow, and the distances involved make it slow or sometimes impossible to reach the place of the call for help. This aspect is extremely important since people tend to believe that they can just call by the radio and be evacuated very easily. And, on the contrary, if the conditions are not right for rescue, the delay and the permanence at altitude can worsen any situation with catastrophic results.
Some victims who are trapped near the summit or in the named sectors (“Travesía” or “Canaleta”) may be forced to spend the night outdoors, which increases the chances of having cold injuries such as frostbite or in the worst-case hypothermia with fatal outcomes.
Helicopter Evacuations and Insurance
The authorities of Aconcagua Provincial Park require those who apply for a climbing permit, either privately or through an agency, to have medical insurance for rescue and evacuation. And from the 2022/2023 season the insurance must state that it “covers evacuation by helicopter for more than 5,000 US dollars”.
The Park control authorities are very demanding in this respect, and it is advisable to ask your personal medical insurance to issue the document with this phrase (covers helicopter evacuation for more than 5,000 US dollars), if you want to save yourself some headaches.
Helicopter evacuations are performed only upon a doctor’s order. After this order, the helicopter is coordinated by two entities: the park ranger service and the agency where services were hired (even if it is only the bathroom or the mules).
The helicopter company is based in Horcones and usually flies from base camps to the Horcones entrance gate. The flight duration is between 12 to 15 minutes depending on the BC. From Horcones the evacuation continues by vehicle to the nearest hospital in Uspallata or, if necessary, to the city of Mendoza.
The helicopter service can only perform air transports for those with medical orders if the weather conditions allow the flight.
The highest heliport is at Camp 2 (Nido de Cóndores) at 5450m and pilots can fly there only if weather conditions are excellent. However, if this is achieved, the transfer is only for one person. Otherwise, evacuations are on foot or by stretcher transfer.
Apart from evacuations by medical order, there is the possibility of hiring the air transfer service privately. In this case, the amount is paid to the helicopter service itself (which has a small office at the base camps) or at any BC agency. Prices vary from one season to another. More and more mountaineers opt for this possibility when coming down from the mountain, for reasons of tiredness and comfort.
Technical Difficulty
Aconcagua is climbed on foot by the routes described above. The summit day, which is the hardest, can have different conditions depending on the season, the previous winters or the presence or not of storms.
A season described as “dry” will mean that walking with only shoes and poles will be enough to reach the summit. On the other hand, these conditions will make it risky to be exposed to falling rocks in the “Canaleta”, so it is advisable to wear a climbing helmet in this section.
A season with periodic snowfalls will create challenging conditions in which it is mandatory to use ice axe and crampons and to have a good crampon technique for the summit day. As mentioned earlier, crampon placement will depend on where the snow starts to fall. This usually occurs from 6,400 m (Independencia) but can occur from Camp 3 or even earlier. Depending on the fresh snow deposited, the beginning of the “Travesía” and the “Canaleta” can be places where the snow deposit and its metamorphosis make favourable conditions for avalanche formation.
There is no fixed rule for characterising a summit day. It is best to check conditions with a park ranger or police rescue patrol or other guides prior to the ascent to the top of the mountain.
Environmental Considerations
and Mountain Protection
Aconcagua Provincial Park was cleaned in 1995. That year tons of garbage and faecal waste were removed. Since then, in the BCs (Plaza de Mulas and Plaza Argentina) and in the intermediate camps to the BCs (Confluencia, Pampa de Leñas or Casa de Piedra) it is mandatory to use the restrooms of the companies that offer their services. Failure to use them will result in severe fines or expulsion from the park.
The same applies to the use of the garbage that is generated. The park rangers will give you a white bag with a code when you enter the park. The idea is to place the garbage that is generated in this bag.
As for the high-altitude camps, it is mandatory to dispose of faecal waste in bags. The bags that are used in this case are also provided by the park rangers (brown bag) and inside them, small bags with the faecal material are placed. Once in the BCs, these wastes can be disposed of.
The UIAA is committed to the protection of the mountain environment and has been since its founding in 1932. The UIAA Mountain Protection Commission was formed in 1969. Today the UIAA spearheads a number of projects related to sustainability in mountain regions including its annual Mountain Protection Award, through the work of its Climate Change Taskforce and its many international partnerships. For further details please visit: https://theuiaa.org/mountain-protection/
The UIAA encourages all climbers and mountaineers to consider their carbon footprint and adhere to local regulations and customs once on the ground.
Final Considerations on Fitness & Acclimatisation
In addition to the UIAA mountain medical papers that you can find here, the following should be considered for both routes:
Slow and gradual ascent favours good response of the organism to altitude. For the same reason, carry loads between camps slowly and if you consider that the load is excessive, you can always hire the service of a porter who will facilitate this task.
Respect personal acclimatisation times. Some people find it more difficult to acclimatise and should take the necessary time to do so. These times should not be forced, otherwise the complications of altitude or high altitude illnesses will appear. Several alternative acclimatisation plans have already been discussed.
Avoid strenuous exercise such as carrying heavy loads for which no one is used to. Often altitude problems appear after a day of strenuous activity.
Drinking and eating enough is of vital importance. On this mountain there is a strong emphasis on hydration because you lose fluid through breathing, due to physical activity and because it is a mountain with low percentages of humidity.
Being properly trained is as important as all of the above. A pattern of measurement can be to fit within the times described for each section. And be honest with yourself and turn around in time if the times actually exceed too much of what is written above. Remember that many incidents, especially at the top of the mountain, are due to being trapped in the mountain due to lack of fitness and not being able to meet the established times.
Weather & Wind
Generally speaking, the air masses coming from the Pacific Ocean (only 150km away) precipitate in the Andes Mountains (roughly oriented from north to south) and enter Argentina as dry and warm winds, Föhn type, known regionally as “Zonda”. This means that in the mountains the humidity is usually lost on the Chilean side of the Andes. Only if it manages to pass the mountain barrier to the east (the Argentine side) can it precipitate.
All this phenomenon makes the climate of the high mountain region of Mendoza province arid and cold.
Something that is rarely mentioned in the guidebooks about Mount Aconcagua is that this mountain can be very windy. Due to the latitude with respect to the equator and added to the cold of the altitude, a summit day can have a wind chill of -30°C or less. That is why the recommended gear to carry is that of a mountain over 7000 meters. High mountain boots and warm down gear are essential.
Many expeditions attempting the summit must turn back due to the strong winds at altitude. These can reach more than 100 km/h and can destroy an entire camp at more than 6000m altitude as happened during the whole month of December 2023 when tents and domes of different companies were blown down at altitude. During that month very few expeditions reached the summit because the opportunities (windows) of good weather were scarce.
And if near 7000m cold is considerable, at base camp and with good weather, high temperatures can be registered during the day, forcing the mountaineers to drink large amounts of liquid to avoid dehydration and paying attention to the prevention of sunburn. During those days of good weather, there is a lot of solar radiation. Wearing full-screen sunscreen, proper clothing and sunglasses (CE 4 type) is a good habit.
Currently in the BCs of Aconcagua, there is internet and consulting the weather forecast is a possible task and within everyone’s reach. There are several web pages that are used for this purpose. With these facilities, not consulting a forecast is practically considered negligence.
Finally, it is worth mentioning that local snowstorms can also appear during the summer. These are convective storms and can transform the mountain and its conditions in hours. At less than 4000m it can rain or snow in the middle of summer and at the top of the mountain more than a meter of snow can fall and accumulate. In short, when the weather is bad on Aconcagua, attempting the summit can have dangerous consequences.
Using Safe Climbing Equipment
A demanding climb like Aconcagua requires significant preparation, training and planning. It also requires having the right equipment. The UIAA encourages all climbers to purchase certified equipment. The UIAA Safety Label is the only global certification for climbing equipment.
The UIAA Safety Label on a piece of climbing equipment means that samples of the equipment have been tested by an accredited, independent third party and shown to satisfy the requirements set forth in the UIAA standard. UIAA standards exist for over 25 times of climbing gear including ice axes, ropes and crampons.
Climbers can search for certified equipment through the UIAA’s dedicated database. Furthermore, the UIAA offers information on how best to purchase climbing equipment.
UIAA Skills Guide
The UIAA is committed to providing climbers and mountaineers with information to develop their skills, whether reinforcing lessons learned and not yet fully assimilated or to increase their technical knowledge and reduce the risks inherent to our sport. The UIAA Alpine Skills Summer guide was first published in 2015. Produced in collaboration with the Petzl Foundation, the guide and has been well received worldwide and is currently available in over ten languages. It covers a host of topics from route planning to frostbite, to reading the weather and climbing in a group. A winter version of the guide will be released shortly. The English language version can be purchased as a digital download here. Foreign language versions are available through UIAA member associations.
Additional UIAA
Medical Resources
MEDICAL ADVICE
Further Reading
Lead Author – Mijel Lotfi
Images – courtesy of Mijel Lotfi and Stock Library
All text and content is reviewed by a dedicated working group within UIAA Medical Commission. Discover more here.